Rendering a blender scene in Unity
Here we'll import and render our previous blender pawn using Unity. Unity supports importing .blend files directly but there are some caveats.You'll have to import your textures manually (copy it to the project assets folder). Also it seems there isn't a 1-1 mapping between blender materials and Unity materials, therefore importing will require you to properly setup your materials once again.
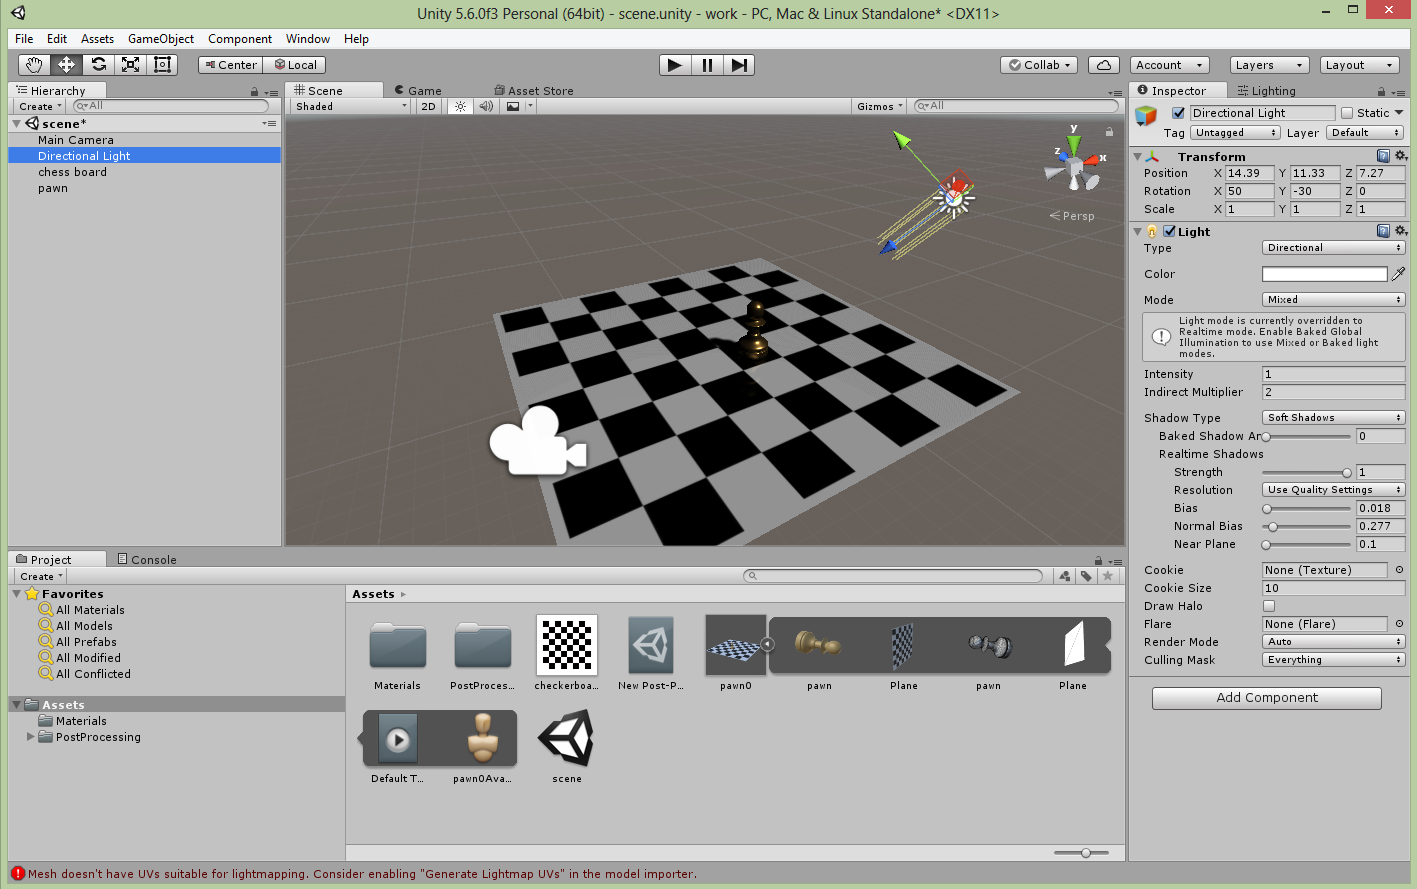
Another issue is that your blender camera and lights are not imported.
Once you import your scene and setup everything that was not automatically imported you can start working on the rendering setup.
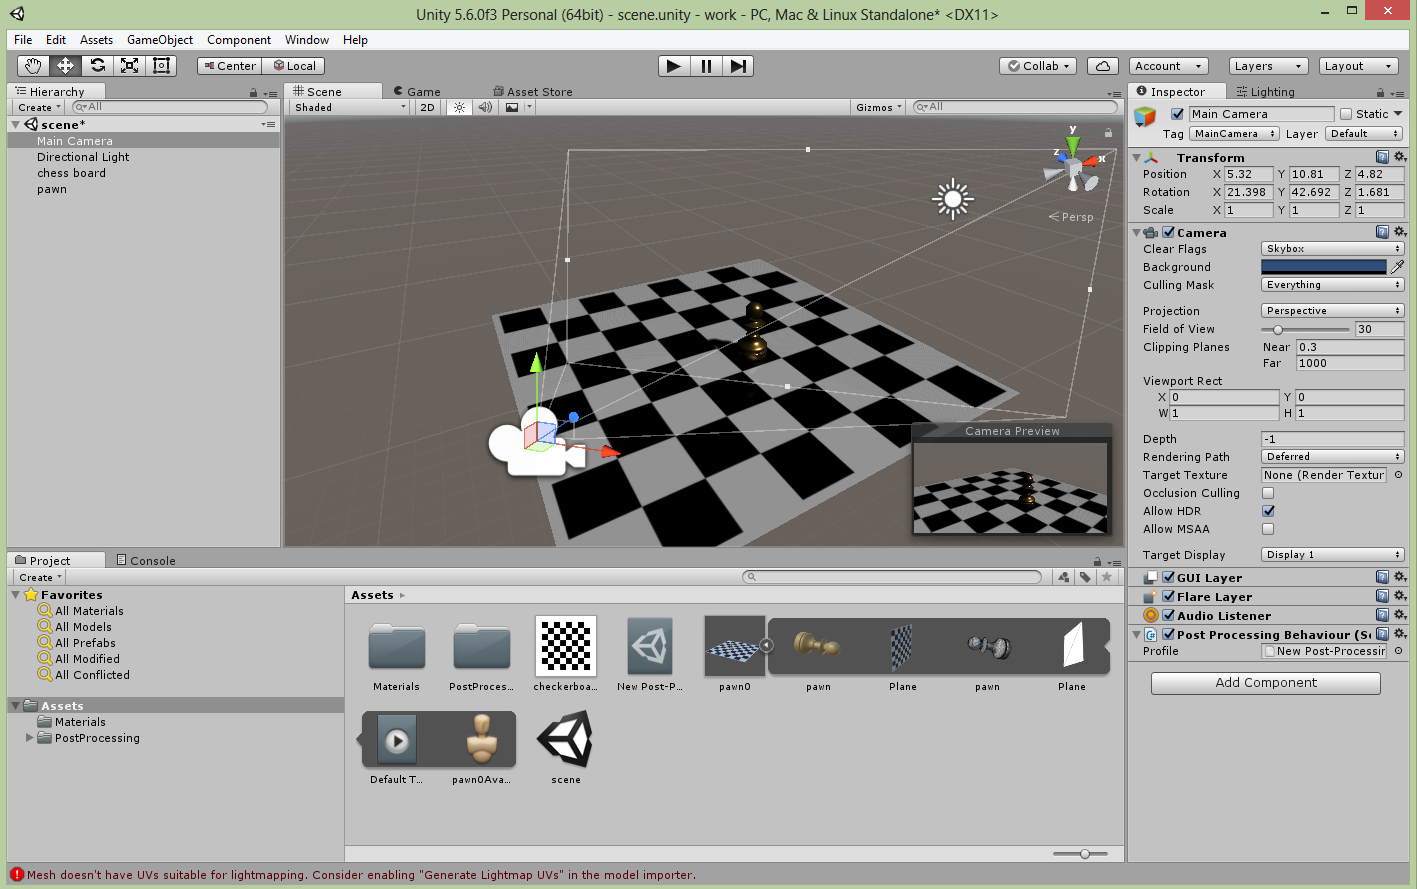
In the end I resorted to using mainly post-processing effects which are easier and works out of the box. I downloaded the Adam demo post-processing pack and setup the post-processing stack adding the script to the camera behavior. This pack comes with almost all post-processing effects one would need, and it is easy to stack them to achieve a good visual.
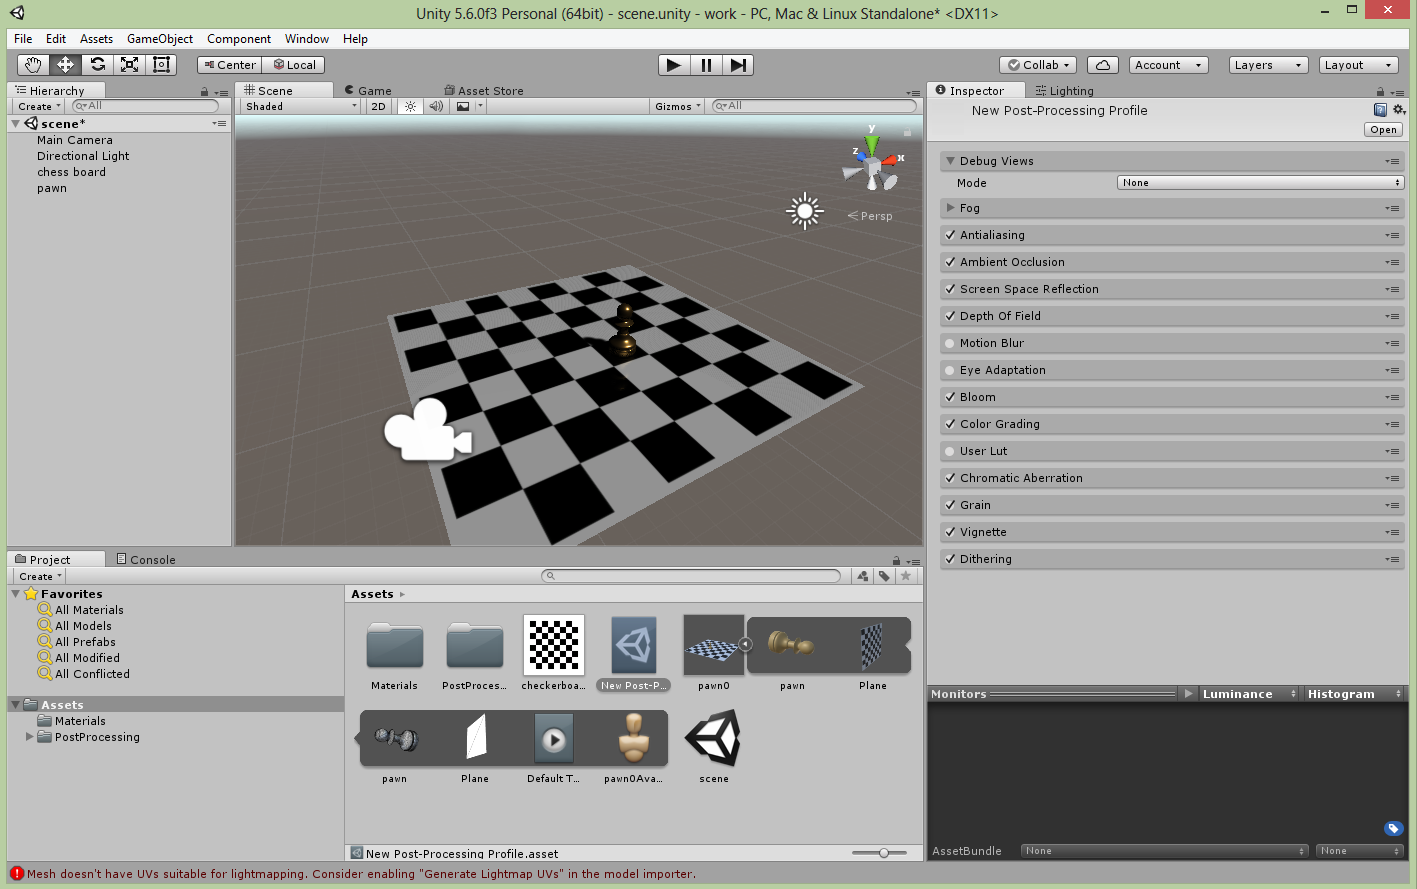
I ended up using Antialiasing as the deferred render does not support MSAA, Ambient Occlusion and Screen Space Reflections (much easier to get working than Reflection probes). Other effects I used include Depth of Field, Bloom, Color Grading, Chromatic Aberration, Grain, Vignette and Dithering.
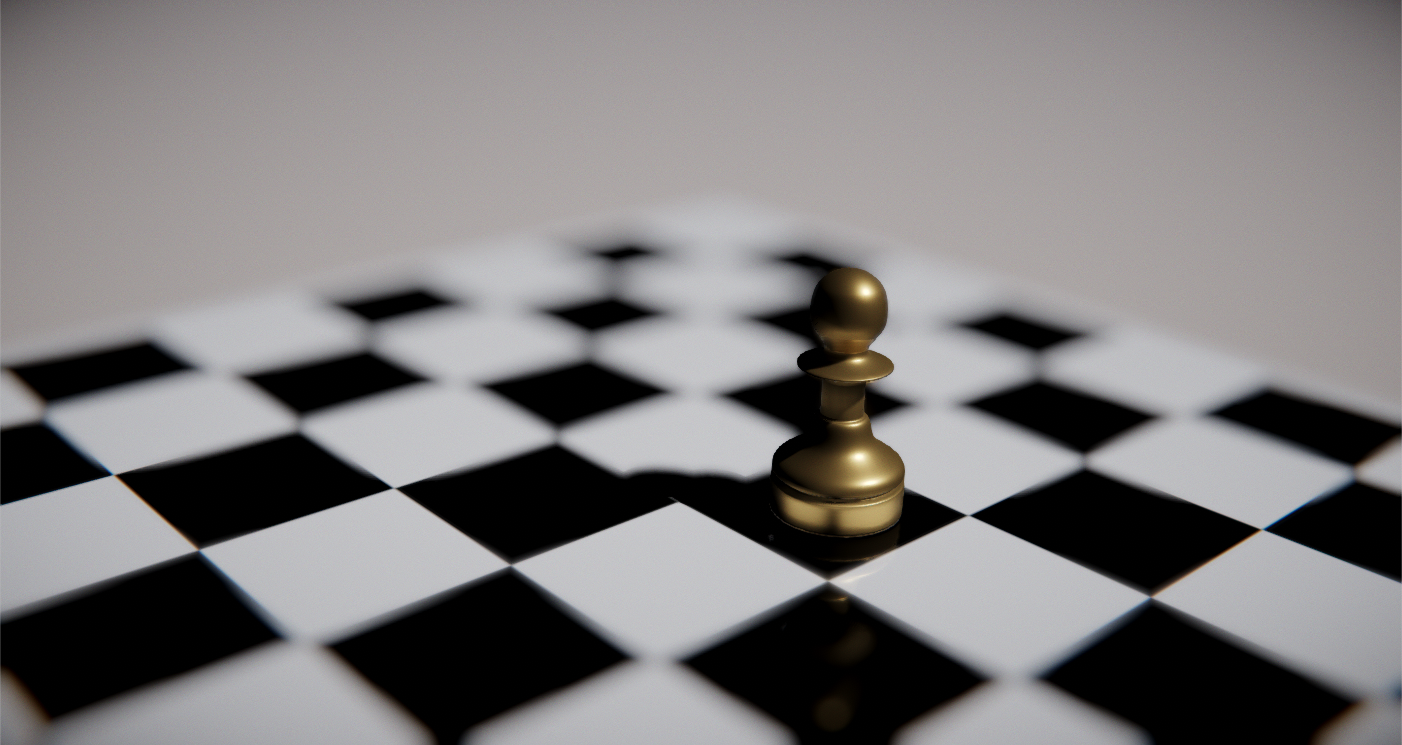
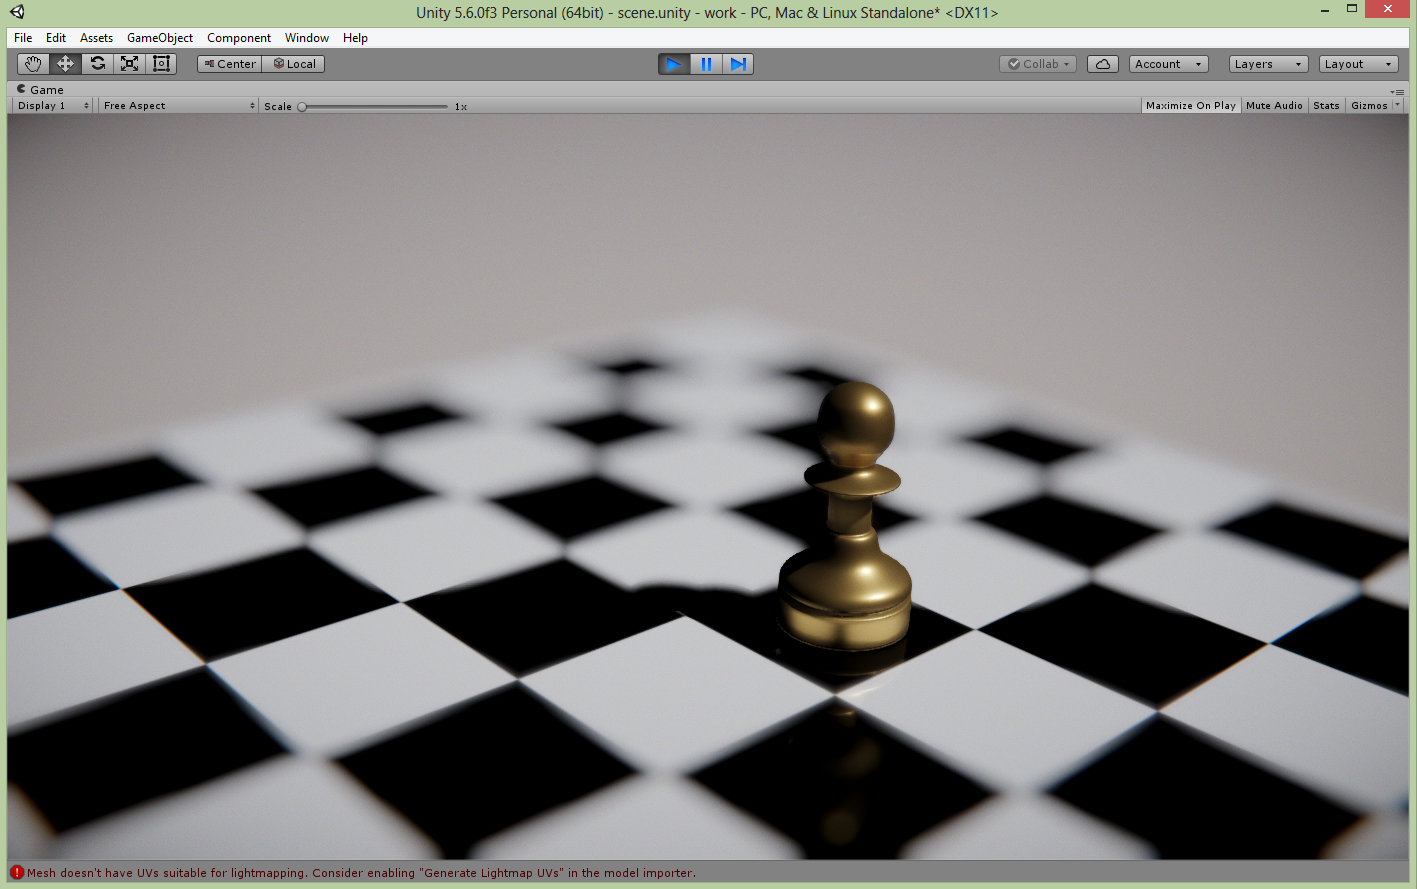
And finally the result